What is Reimage Repair?
By Reimage
What is it?
Reimage Repair is registry cleaner, a class of third party software utility designed for the Microsoft Windows operating system, whose purported purpose is to remove redundant items from the Windows registry. Registry cleaners try to automate the process of looking for invalid entries, missing file references or broken links within the registry and resolving or removing them.
Why should I uninstall Reimage Repair?
If not being actively used, Reimage Repair should be disabled from running as it utilizes needed PC resources even when the system is idled. It is configured to auto start and run in the background when your PC boots. It is recommended if you want to continue running Reimage Repair, you should only use it on demand and start it manually.
Typical installation path: C:\Program Files\reimage\
Description from Reimage“Reimage will Scan and Detect and Fix and Repair your PC by utilizing the follow features and benefits. Scan Reimage scans through your entire PC, uncovering information about your Windows Operating System in order to learn about your PC's Hardware, Stability, and Security Issues. Detect Reimage detects damage to your PC within the following areas: Security Threats: Malware, Viruses, and Trojans, Spyware. Hardware Issues: Low Memory, Hard Disk Speed, CPU Power and Temperature. The Scan recommends solutions for your Hardware Problems.”
Publisher about URL: http://www.reimageplus.com
Files installed by Reimage
- tdataprotocol.dll (ReImage plug-in for Internet Explorer by Reimage Limited)
- jsloader.dll (ReImage Browser Helper for Internet Explorer by Reimage Limited)
- rei_axcontrol.dll (Reimage ActiveX by Reimage Limited)
- reimage.exe (Reimage. Making PCs work like new, everyday. by Reimage Limited)
How to Automatically Uninstall Reimage Repair (with Boost)
If you you do not have Boost installed yet, download Boost and enjoy your PC.
Open Boost by either double-clicking the Boost icon 

 in your notification area next to your PC's clock, or single-clicking the Boost icon and clicking the Open Boost button on the top left of the Boost notification window.
 If you are not currently on the My PC screen of the main Boost window, click the My PC tab.
Click the Optimize programs button  , this will launch the Program Optimization screen.
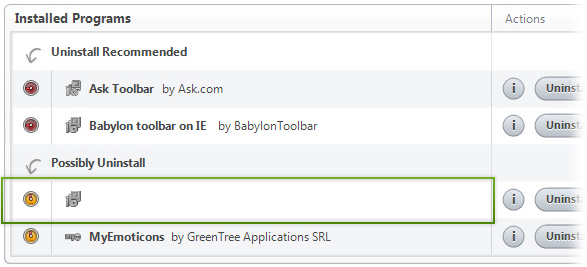
Locate the program in the list called Reimage Repair by Reimage. (The program could be listed under any of the section such as Uninstall Recommended, Possible Uninstall, etc. based on how well Reimage Repair performs on your PC.)

Reimage Repair by Reimage
To the right of the list item, click the Uninstall  button and Boost will completely remove Reimage Repair from your PC.
How to Manually Uninstall Reimage Repair (with Windows)
Use Add/Remove Programs control panel in Windows makes to uninstall Reimage Repair. Follow the appropriate instructions below to use this control panel.
Windows 7
From the Start menu, select Control Panel.
In Large or Small icon view, click Programs and Features. If you're using Category view, under "Programs", click Uninstall a program.
Select Reimage Repair from the list of programs, and click Uninstall. Alternatively, right-click the program and select Uninstall.
Windows Vista
From the Start menu, select Control Panel.
In Classic View, double-click Programs and Features. In Control Panel Home view, under "Programs", click Uninstall a program.
Select Reimage Repair from the program list, and click Uninstall. Alternatively, right-click the program and select Uninstall.
Windows XP
From the Start menu, select Control Panel.
Click the Add or Remove Programs icon.
Select Reimage Repair from the list of programs and click Remove.