What is GeekBuddy?
By Comodo Security Solutions Inc
What is it?
Comodo's GeekBuddy services are Comodo's paid-for chat-based support services to help users who are experiencing issues with their PC. The Services are provided only via Internet chat and remote desktop sharing.
Why should I uninstall GeekBuddy?
Unless you are actively using GeekBuddy you should disable it from running as it utilizes an abnormal amount of system resources even when you PC is idle. It is also configured to auto start and run in the background when your PC boots. It is recommended if you want to continue running GeekBuddy, you should only use it on demand and start it manually when needed.
Typical installation path: C:\Program Files\COMODO\GeekBuddy\
Description from Comodo Security Solutions Inc“We'll evaluate your computer's performance and then fine tune key areas to improve speed and stability. We'll activate your computer's security settings to prevent loss of sensitive data and identify theft. We'll customize your PC to your needs including text size, display resolution, backgrounds, screensavers and more. Not only will your GeekBuddy clean your PC of viruses and spyware... your Buddy will also install Comodo's award-winning. Antivirus and Anti-Malware software free of charge. And even if you end your GeekBuddy contract, you keep the software free, forever. No strings attached. We'll resolve Windows operating system errors and check for basic hardware conflicts with Windows. GeekBuddy is part of the Comodo Group, one of the world's most trusted Internet Security and Antivirus technology providers. With over 45 million PCs around the world protected by Comodo security software - including its award-winning free Antivirus and Anti-malware solutions - Comodo is guided by its mission to Create Trust Online.”
Publisher about URL: http://www.comodo.com
Files installed by GeekBuddy
- CLPSLA.exe
- export.dll
- launcher.exe
- launcher_helper.exe
- libeay32.dll
- publisher.dll
- QtCore4.dll
- QtGui4.dll
- QtNetwork4.dll
- QtScript4.dll
- QtSql4.dll
- QtWebKit4.dll
- QtXmlPatterns4.dll
- ssleay32.dll
- unit.exe
- unit_manager.exe
- unit_notifier.exe
- unity_core.dll
- web-client.dll
- welcome_screen.exe
How to Automatically Uninstall GeekBuddy (with Boost)
If you you do not have Boost installed yet, download Boost and enjoy your PC.
Open Boost by either double-clicking the Boost icon 

 in your notification area next to your PC's clock, or single-clicking the Boost icon and clicking the Open Boost button on the top left of the Boost notification window.
 If you are not currently on the My PC screen of the main Boost window, click the My PC tab.
Click the Optimize programs button  , this will launch the Program Optimization screen.
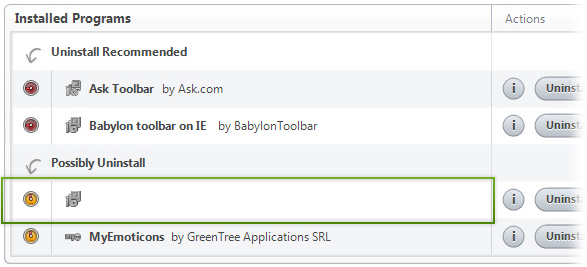
Locate the program in the list called GeekBuddy by Comodo Security Solutions Inc. (The program could be listed under any of the section such as Uninstall Recommended, Possible Uninstall, etc. based on how well GeekBuddy performs on your PC.)

GeekBuddy by Comodo Security Solutions Inc
To the right of the list item, click the Uninstall  button and Boost will completely remove GeekBuddy from your PC.
How to Manually Uninstall GeekBuddy (with Windows)
Use Add/Remove Programs control panel in Windows makes to uninstall GeekBuddy. Follow the appropriate instructions below to use this control panel.
Windows 7
From the Start menu, select Control Panel.
In Large or Small icon view, click Programs and Features. If you're using Category view, under "Programs", click Uninstall a program.
Select GeekBuddy from the list of programs, and click Uninstall. Alternatively, right-click the program and select Uninstall.
Windows Vista
From the Start menu, select Control Panel.
In Classic View, double-click Programs and Features. In Control Panel Home view, under "Programs", click Uninstall a program.
Select GeekBuddy from the program list, and click Uninstall. Alternatively, right-click the program and select Uninstall.
Windows XP
From the Start menu, select Control Panel.
Click the Add or Remove Programs icon.
Select GeekBuddy from the list of programs and click Remove.